Navigate
Products
Download
eShop
Upgrade
About
Training
Support

Navigate
Products
Download
eShop
Upgrade
About
Training
Support
The Ultimate Box is a read/write device that transfers embroidery designs from the hard drive of your computer to a re-writable blank embroidery card that fits your Brother, Babylock, Bernina Deco, Simplicity, White and Viking/Husqvarna embroidery machines. The 2-slot Ultimate Box also supports the cards for Pfaff and Bernina Artista embroidery machines. The Ultimate Box writes up to 230.000 stitches to the Amazing/Magic and Brother 512 Kilobyte (4 Megabit) blank cards. The Ultimate Box writes over 450.000 stitches to the Ultimate Card. It reads and saves designs back to the hard drive of your computer from the above cards and most pre-programmed design cards (except licensed design cards). The box connects with a cable to the USB port of your computer.
Note: Ultimate Box is developed by Vikant Corporation. Vikant Corporation is not affiliated with any manufacturers mentioned here. All brand names and product names are trademarks and service marks of the respective manufacturers.
1 - Run Embird and select "Ultimate Box+" menu (Picture No. 1).
1. Select "Ultimate Box+" menu
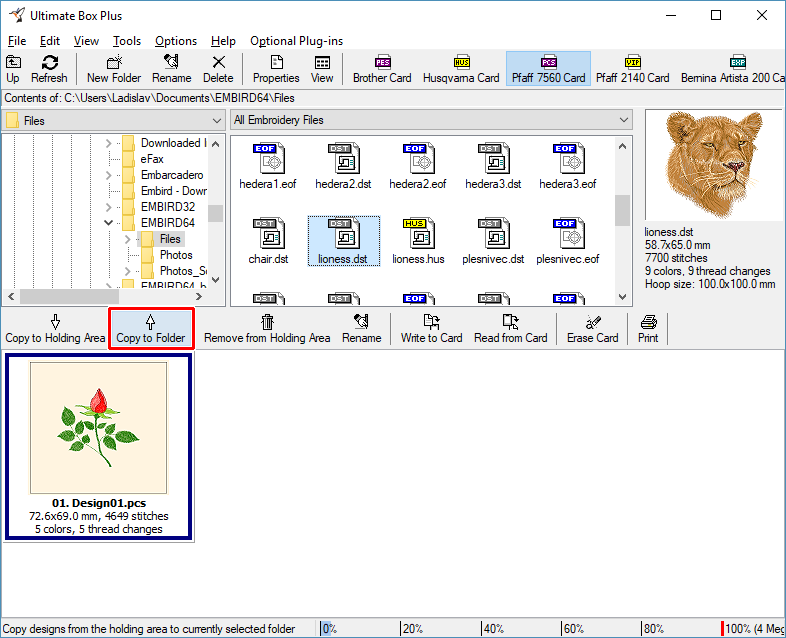
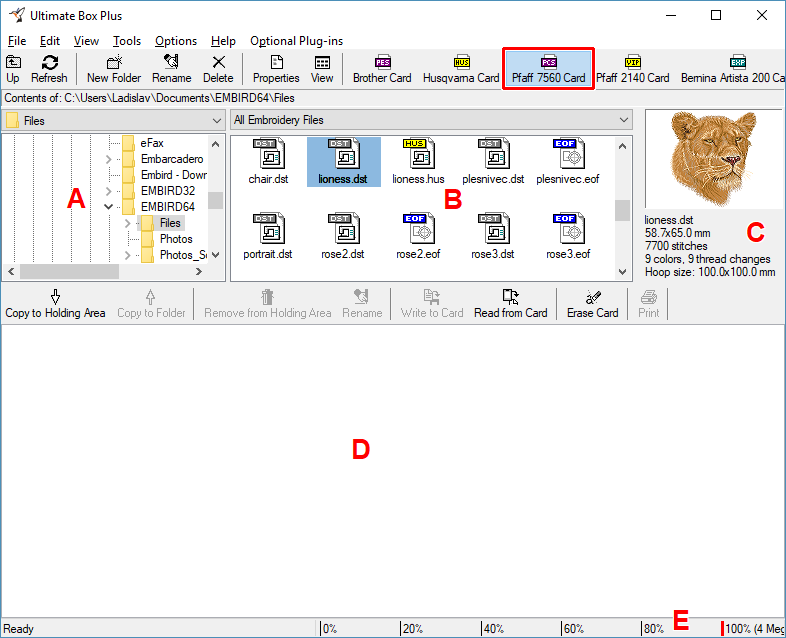
2 - Ultimate Box window will appear on the screen (Picture No. 2). The Ultimate Box screen is divided into two main sections:
The top portion of the screen is used to navigate folders on your computer and select designs. It is divided into three areas. The Folder Tree (top left, A) allows you to easily navigate to the folders on your computer. While browsing, double click on folder to open or close it. The full path of current folder is displayed above this panel. The File Browsing Panel (top middle, B) displays the files in the currently selected folder. You can filter the files displayed in the File Browsing Panel by selecting Mask in the box above this panel. Click on a file to select it and preview it in the Preview area (top right, C). Above this section is the main toolbar and menus.
The bottom section of the screen is a Holding Area (D) for writing, reading and viewing designs on the embroidery card. At the bottom of the Holding Area is the status bar which shows you the amount of space used on the embroidery card and the amount remaining (E).
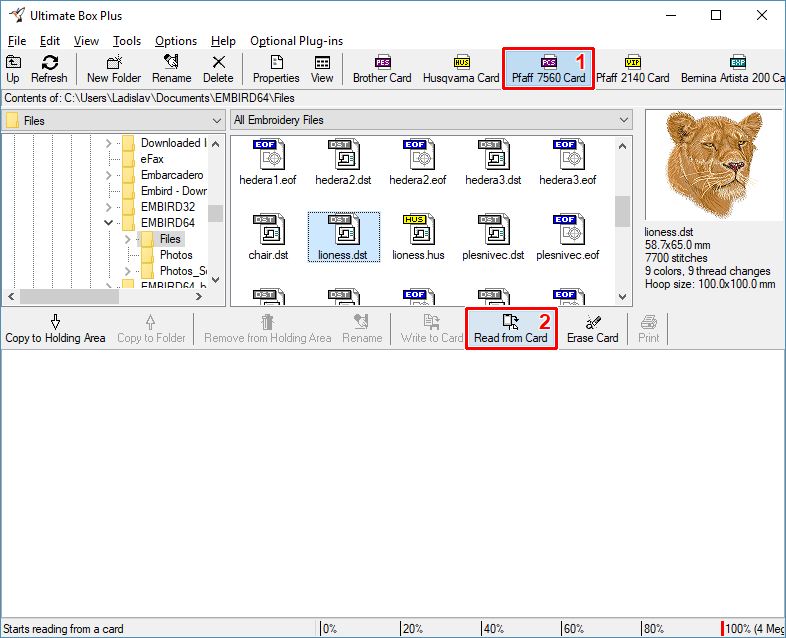
Choose your card type in the top portion of the screen. In this example we are going to read the designs from the card compatible with "Pfaff 7560" embroidery machines.
2. Choose card type
3 - Click the "Read from Card" button (Picture No. 3).
Warning: All designs in the Holding Area are removed and replaced by the designs from the embroidery card.
3. Read all designs from the card
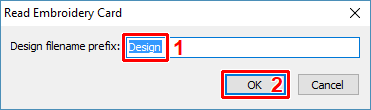
4 - If required by the embroidery card, you are prompted for a design filename prefix. Modify this if desired and click "OK". Designs will use this prefix and be assigned sequential numbers (Picture No. 4).
4. Specify filename prefix
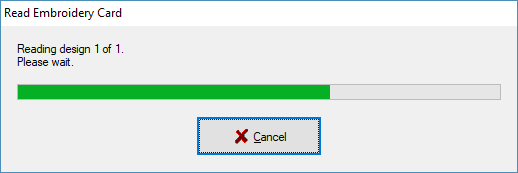
5 - The embroidery card is read and the designs are displayed in the Holding Area. This process may take up to 5 minutes (Picture No.5).
5. Reading process
6 - Use the Folder Tree to navigate to the desired folder. You can also create a new folder to store the designs using the "New Folder" tool bar button. After the destination folder is selected, click the "Copy to Folder" button (Picture No. 6). This will copy the selected design ("Design01.pcs" in this example) to the chosen folder.
6. Copy file to chosen folder