Navigate
Products
Download
eShop
Upgrade
About
Training
Support
Navigate
Products
Download
eShop
Upgrade
About
Training
Support
The following tutorial explains how to print a template from Editor. In Embird it is possible to change the position of design being printed - you can move the design across the paper to the right position if you want to save the paper space - e.g. if you want to print two or more designs using the same sheet of vellum.
Note: You can print the documentation for your designs also from Manager, using the commands contained in the "Right Panel > Print" menu. There are several types of documentation available in this menu.
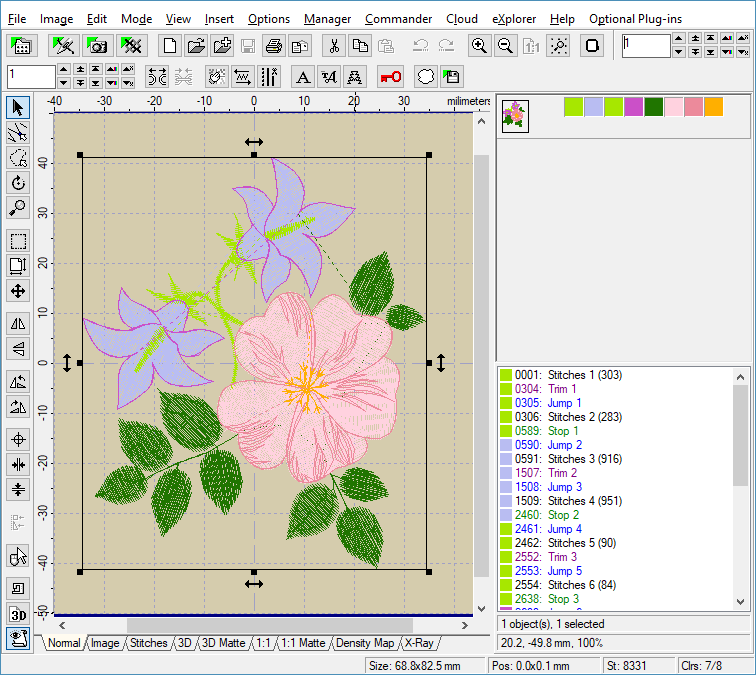
1 - Run Embird and click "Editor" menu to switch to Editor window.
2 - Select the "File > Open" menu to open a file which you want to print out (Picture No. 1).
1. Open design
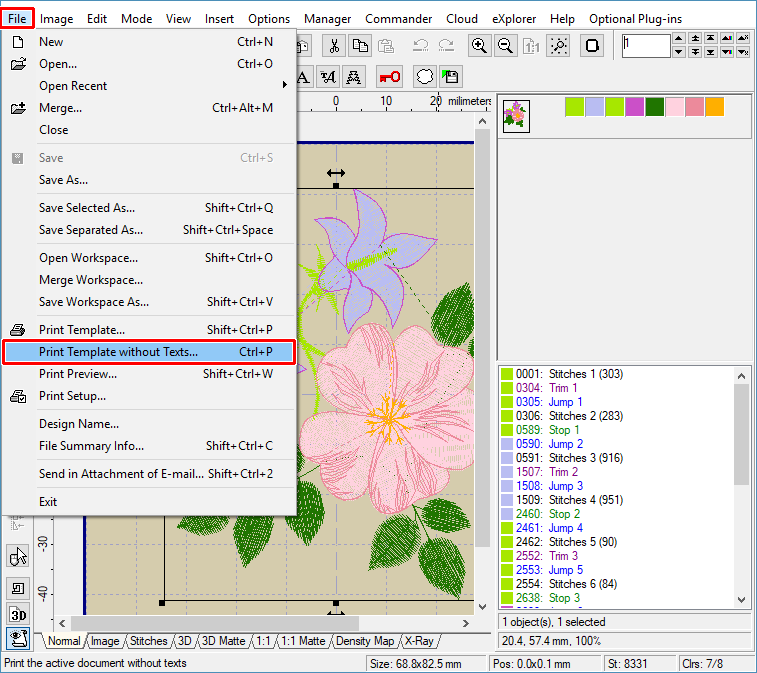
3 - Click the "File > Print Template without Texts" menu if you want to have the possibility to prescribe the design position on the printer paper (Picture No. 2).
2. Select "File > Print Template without Texts" menu
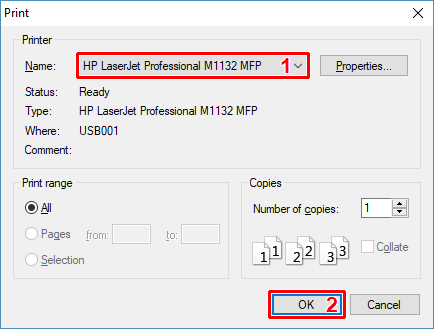
4 - The "Print" dialog will appear on the screen (Picture No. 3). Choose your printer in the "Name:" box, and click "OK" button to continue.
3. Choose printer
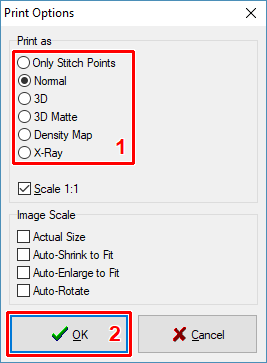
5 - Optionally, change parameters of printing (Picture No. 4).
4. Print options
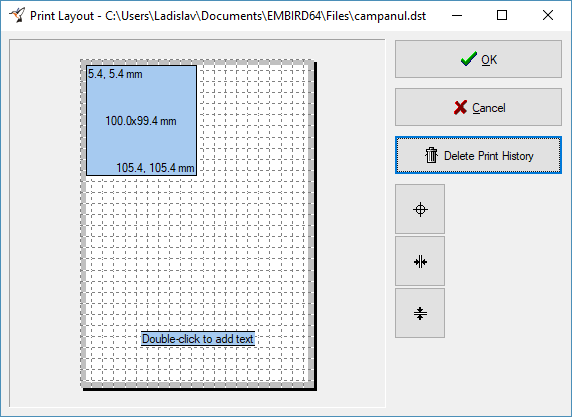
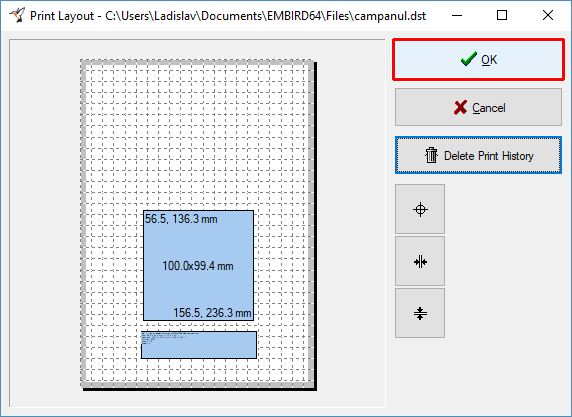
6 - The "Print Layout" dialog box will appear on the screen (Picture No. 5). The cyan rectangle represents the hoop being printed. In this example, the hoop size is 100 x 100 mm, as it can be seen on the caption displayed in the middle of the cyan rectangle. The captions in the corners display the current position of these corners over the printer paper.
5. Print layout
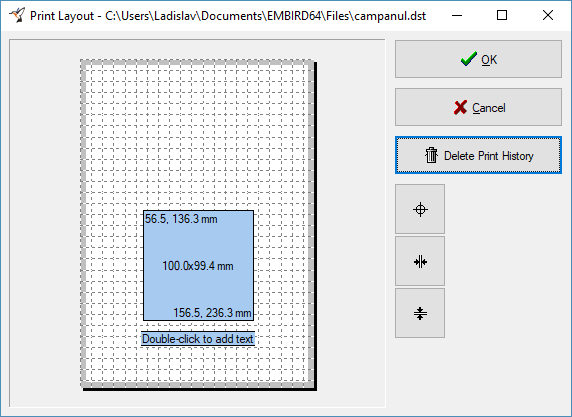
7 - You can change the hoop position by moving the mouse pointer to the cyan rectangle, depressing the left mouse button and moving the mouse to change the position of the rectangle. Finally, release the left mouse button (Picture No. 6).
6. Move hoop to new location on paper
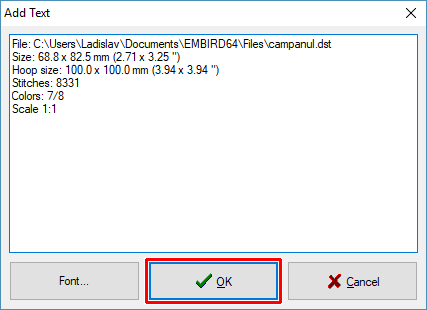
8 - You can double-click the paper area to add a text. This will display a dialog box with the pre-defined text, which relates to the design being printed (Picture No. 7). You can delete this text, or add some new lines. If you want to change the font of the text, click the "Font" button and choose the new one from the dialog box which appears on the screen. Click "OK" button to continue.
7. Add optional text
9 - You can move also the rectangle containing the text across the paper area (Picture No. 8). Use the same technique as explained in step 7. Finally, click "OK" button to print the template.
8. Print template
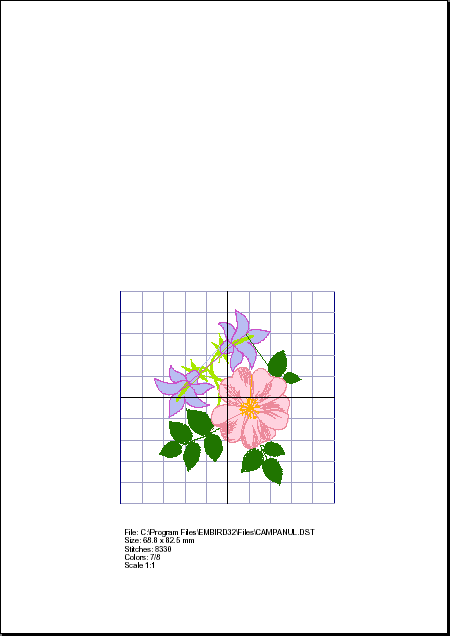
10 - The template will be printed with the hoop area and text area located on their prescribed positions (Picture No. 9).
9. Printed template
